
 FAQ
FAQ
- How can I run and install the software over a network?
- How many computers can the software be installed on?
- What if I don't want to run the software over a network?
- I would like the database to be held on a internet server, not on a local hard drive. Is this possible?
- Why am I receiving warnings from my firewall during installation?
- Server Installation - Why am I being asked for a server IP when the software is started?
- When I start the software I get an error message - "The application failed to initialize properly (0xc0000135). Click OK to terminate the application."
- Client Installation - I can't access the data on the server computer from my client machine
- How do I licence/register the software?
- I have filled in the information to request my licence key and the software says the key has been sent. However nothing has yet arrived in my email inbox.
- When I try to license the software I get a message saying 'Registration failed, this licence file is either for another version, old or invalid format'
- Can the same licence key be used for the other computers?
- If I have to re-install the software on the same computer do I need to request a new licence key?
- I get a message saying - The maximum number of concurrent network users.....
- Why am I getting a ‘Trial Expired’ message after I have been using the software?
- How do I purchase additional concurrent user licences?
- How do I back up my data?
- How do I find my back up files?
- How do I send my database to you?
- How do I migrate my data and gallery backup from Landlords Property Manager version 7.65 or a lower version?
- How do I restore a back up that I have made?
- Can I protect my data with a password?
- I'm being asked for a password when I start the software
- How many portfolios can I create?
- How do we move the software and database from one computer to another?
- Why am I being asked for a server IP when the software is started, even though I am on a local LPM server installation that was running fine until now?
- How do I configure the early warning system to display at startup?
- How Can I Extract Data from RLA' Property Manager?
- What help and support do I get?
- How do I submit a support ticket?
- I get an error message when I run the software or download updates
- What happens if my support contract is out of date?
- How do I check for new updates?
- I have been prompted for updates but can't download them
- How do I get updates?
- I have an old version, but when I check for updates it says none are found.
- My software won't start after an update, what can I do?
- I have version 7.6x but can't update to version 7.7x through automatic updates
- How do I enter a new tenant?
- How do I amend the details of an existing tenant?
- Houses in Multiple Occupation (HMOs)
- The Tenancy Agreement
- How do I handle DSS payments?
- Can I print off the amount of rent that has been paid by a tenant and send the report to him?
- No matter when a tenant moves in we like to get them to pay rent by the end of the month and thereafter they pay monthly. How do we handle this?
- How can I delete all the entries in the rent schedule?
- Is it possible to only display 'Active' tenants and hide those tenants who have left the property?
- I have a tenant who is in arrears and is now making overpayments to catch up. What is the best way to enter these in the software?
- I have a house I let to multiple tenenta. I want to track rent on a per tenant basis. However I also want them on the same (i.e. one) tenancy agreement.
- Can the software manage both private/residential and commercial property?
- Can I manage short term and/or long term holiday lets?
- Can I manage my overseas properties?
- Can the software calculate in multiple currencies?
- Inputting Insurance Data
- How do I handle my letting agents fees?
- Why Has My List of Properties Disappeared from the Bottom of the Screen?
How do I download and install the software?
When you make a purchase, you will receive an e-mail directing you to our website from which you can download the software.When clicking on the download link at this website, users of Internet Explorer or AOL browsers may have the option to Run the installation file. Firefox users may have the option to Open the file. You should not run or open the file from the website. You should use the Save option to download the file onto your computer.
There are 2 reasons:
1. You will need a copy of the installation files in case you need to install the software on a other computer or to re-install it on the same computer at a future date. If you install from the website, you will not have a copy of the installation file. If you download the file, you can store it safely. You can even copy it onto a USB or burn it onto a disc for safekeeping.
2. Sometimes corruption can occur in the installation file when running or opening the file from the website. This can cause errors which may prevent the software functioning correctly.
When you have downloaded the installation file, double-click on it to install the software.
I need to re-install the software but I don't have a copy of it saved on my computer
Simply log into your Customer Area via the link below to download your version of Landlords Property Manager:
http://www.propertyportfoliosoftware.co.uk/index.php?cmd=login_user
If you cannot recall your password please click on the 'Forgot your password' link to have it sent out to you.
Once downloaded and installed you need to request a separate licence key, as the licence keys are specific to a computer. Please click on the following link to see exactly how the software is licensed:
http://www.propertyportfoliosoftware.co.uk/SoftwareDemos/Registration_demo08/Registration_demo08.htm
Why am I receiving a message titled "NSIS Error" when I run the installer?
NSIS is the installer system that Landlords Property Manager uses for its deployment. Such an error could occur in case the installer file was damaged during download (i.e. the download is interrupted and the file remains incomplete).In order to resolve this problem you should download the installer again. However most web browsers will reuse their cache and will serve the same damaged file again instead of fetching it from the website. In order to ensure the file gets actually downloaded anew, please clear your browser's cache first.
Clearing the cache in Internet Explorer 8 is done by using the menu option Tools > Internet Options. In the General tab of the dialog that pops up, locate the Browser History section and click Delete. You will be offered a check list of items to clear. It will be enough if you only keep the option Temporary Internet Files checked. Then click Delete.
After you have done this the browser will indeed download the file from the website instead of serving the old corrupted copy again.
How can I run and install the software over a network?
The software can run over a network by following the instructions in the following networking guide:How many computers can the software be installed on?
The software can be installed on up to five different computers at no extra cost.To install the software onto another computer, transfer the installation file to that computer, or download it onto that computer from our website (please use the download link that was sent out to you at the time of purchase in your order confirmation email).
When you have downloaded the installation file, double-click on the file and complete the installation process as before, including the registration. When registering the second or third computer, be sure to use the same e-mail address which was used to register the first computer. You will then receive the licencing information via e-mail.
What if I don't want to run the software over a network?
If you don't want to run the software over a network then this is not a problem.You just need to make sure that when you install the software on each computer you just install it using the default settings, i.e. in server mode.
I would like the database to be held on a internet server, not on a local hard drive. Is this possible?
As long as the server in question is a Windows server there should be no problem. You should simply install the software there, configure the server's firewall and the router to allow communication on the MSSQL ports (1433 TCP and 1434 UDP by default) and enable port forwarding on the router if present.
The instructions in the help file give further details on how to set this up.
Why am I receiving warnings from my firewall during installation?
Depending on the firewall software you have installed, and on it's settings, it may ask if you'd like to allow the LPM installer access to the Internet.This is due to the fact that some components that are required by the software are automatically downloaded by the installer in case they are not present on your system.
These components are the Microsoft .NET Framework 2 and Microsoft SQL Server 2005 Express. They are both served by Microsoft's official download servers so there are no security concerns whatsoever and you can safely allow the LPM installer access to the Internet so that they can be fetched.
Server Installation - Why am I being asked for a server IP when the software is started?
When the software has been installed on the 'Server' (primary) computer and it is first started, it should start without any problems.If you are requested for the Server IP then this normally occurs if one of the components of the program hasn't installed correctly.
It sometimes happens but is very rare.
Follow the instructions in step 1 below to resolve the problem. If you still get the same problem then follow those in step 2. If this still doesn't resolve the problem then refer to step 3.
Step 1
1. Uninstall the current version of the software
Go to Start ==> Programs ==> Landlords Property Manager NT Professional ==> Uninstall
This will remove the software from your computer.
2. Re-install the software again. During installation, make sure the 'server' option is selected.
The software should start now without you being prompted for the the server IP. However if you still get prompted for the Server IP then follow Step 2.
Step 2
This problem is most often due to an existing but damaged installation of MSXML 6. Please go to Control Panel -> Add/Remove Programs, locate the MSXML 6 entry, and uninstall it. Then try installing Landlords Property Manager again.
Please note that sometimes damaged software can not be removed properly this way. If you want to make sure that MSXML 6 will be uninstalled properly, then you should use a small utility published by Microsoft that can uninstall damaged software much more reliably than the usual process.
Please download the utility's installer from here:
http://www.propertyportfoliosoftware.co.uk/download/msicuu2.exe
Run it (if you are on Vista you may need to right click and use "Run as administrator") and it will install the "Windows Install Clean Up" application. You should see it appear in your start menu. When you run this tool you will see a list of all installed programs. Just locate MSXML 6 there and hit "Remove". If there is any further interaction required, just accept the default values along the way.
After MSXML6 has been uninstalled, please try installing LPM again. This time it should proceed properly.
Step 3
On some Windows XP installations upgrading to Service Pack 3 (SP3) may be mandatory in order to ensure a proper installation, even though Service Pack 2 (SP2) is usually enough.
Windows XP Service Pack 3 (SP3) is a free update for Windows XP. SP3 includes all previously released Windows XP updates, including security updates, hotfixes, and select out-of-band releases. To install SP3, either Windows XP Service Pack 1a (SP1a) or Windows XP Service Pack 2 (SP2) must already be installed.
In order to check what Service Pack you have installed please right click on "My Computer" and select Properties. In the dialog window that pops up you should be able to see a line regarding which version of Service Pack has been installed. If it is a version below SP3, the easiest way to upgrade is by following this link which should perform the update automatically:
http://view.atdmt.com/action/asc_winrep_DLwinxpsp3nowwinupdates
Normally the process takes several hours, but having SP3 is highly recommended in general, since it provides a lot of system improvements and strengthens the security of Windows XP.
After the update you will be prompted to restart your computer, after which you should be able to install LPM properly.
When I start the software I get an error message - "The application failed to initialize properly (0xc0000135). Click OK to terminate the application."
This problem is related to damaged .NET Framework and normally relates to the Windows XP operating systems.Usually LPM installs the .NET version that it requires during setup. If the required .NET version is already installed LPM does not re-install it. This means that .NET is already installed on your computer but it is probably damaged. .NET is the foundation LPM is built upon.
You can repair your .NET installation by going to Control Panel -> Add/Remove Prgrams (or Control Panel -> Programs -> Programs and Features, depending on your Windows version), and locate "Microsoft .NET Framework" or "Microsoft .NET Compact Framework", find the entry with the highest version number, and click the "Change/Repair" button.
This starts the repair process. If there are any on-screen instructions during it, just accept the defaults.
Vista and later versions of Windows come with .NET 3.5 already installed so the need to download it is only present on some XP installations.
Client Installation - I can't access the data on the server computer from my client machine
There could be a number of reasons for this. Please try the following: 1. Connecting to a Remote Database Server over the InternetWhen connecting to a remote database server over the Internet you should use the Global IP of the server.
Please ask the user running the server for these details (they can be quickly found in the Preferences -> Database Connection Settings dialog box).
Once you have the Global IP of the server and the database password, please specify these details in Preferences -> Database Connection Settings.
2. Connecting to a Remote Database Server within a LAN
When connecting to a remote database server within the same Local Area Network (e.g. office) you could use either the Computer Name or the Local IP of the server.
Please ask the user running the server for these details (they can be quickly found in the Preferences -> Database Connection Settings dialog box).
Once you have the Computer Name (or Local IP) of the server and the database password, please specify these details in Preferences -> Database Connection Settings.
3. Is the Server in Sleep or Hibernation Mode?
Check that server computer is on and not in sleep hibernation mode. These modes will make the server switch itself off after it has not been in use for a certain period and this means that the client computer cannot access it.
- Turning Sleep Mode off in Vista/Win7: Open the Control Panel, enter "Power Options" and select the "Change when the computer sleeps" section from the left hand menu. Select "Never" from the drop-down box for the "Put computer to sleep" option and click "Save Changes".
- Turning Hibernation Mode off in Vista/Win7: Open the Control Panel, enter "Power Options" and select the "Change when the computer sleeps" section from the left hand menu. Clicking on "Change advanced power settings" will open up a dialog box with various power mode properties. Find and expand the "Sleep" branch and then the "Hibernate after" sub-branch. The timeout value is in there. If it says "Never" then the computer will not hibernate. If there is some value set, then click on it to edit it and enter 0. Hit the "Apply" button to save the changes.
- Turning Sleep and Hibernation Mode off in WinXP: Open the Control Panel, enter "Power Options" and select "Never" for both the "System standy" and "System hibernates" options and click OK to save the changes.
Check that the IP address of the server has not changed. This IP address can change if the router has been rebooted or the IP address is a dynamic IP address.
If the Global or Local IP address has changed in steps 1) or 2) then please enter the new IP address.
5. Firewall Settings
You may need to modify the firewall settings on the server in order to allow incoming connections to the database server.
If there is a personal firewall on the server (like Windows Firewall), you must add a couple of program exceptions thus allowing incoming requests to be processed by the database server. The two programs that need to be added as exceptions are:
- C:\Program Files\Microsoft SQL Server\MSSQL.1\MSSQL\Binn\sqlservr.exe
- C:\Program Files\Microsoft SQL Server\90\Shared\sqlbrowser.exe
(The paths may slightly differ, i.e. if C: is not the system drive or if there has already been a MS SQL Server installed into another location.)
If you need to allow remote connections to your database server coming from outside your home/office (LAN) network, then please make sure that the following ports are also open for incoming remote connections:
- TCP 1433
- UDP 1434
You must enable these ports in both the server firewall (e.g. Windows Firewall) and in your router firewall (if any). If the server is behind a dedicated computer serving as a firewall, please enable these ports in that firewall too.
How do I licence/register the software?
To licence the software, you must request a licence key.Please click on the following link to see exactly how the software is licensed:
http://www.propertyportfoliosoftware.co.uk/SoftwareDemos/Registration_demo08/Registration_demo08.htm
I have filled in the information to request my licence key and the software says the key has been sent. However nothing has yet arrived in my email inbox.
Whenever a valid request for a licence key is made the licence is issued immediately. If it has not arrived within five minutes then please check your email ‘spam’ or ‘junk’ folders as it may have gone in there.When I try to license the software I get a message saying 'Registration failed, this licence file is either for another version, old or invalid format'
This message is displayed when somebody is trying to licence a version of the software they are not entitled to or have an old licence key.Please check and make sure that you have installed the version that you purchased (see your invoice for your purchase details). If need be re-install the correct version of the software and request the licence key again.
If you do have the correct version already installed then simply try requesting the licence key and registering the software again.
If the problem still exists the submit a support ticket.
Can the same licence key be used for the other computers?
No. The licence key is unique to a computer. This means that if the software has been installed onto another computer, then you need to request the licence key again for that computer.If I have to re-install the software on the same computer do I need to request a new licence key?
No – the licence key is unique to the computer on which the software is installed. If you are re-installing the software onto the same computer, you can re-use the license key with which you were originally issued.I get a message saying - The maximum number of concurrent network users.....
This means that you have exceeded the number of users who can concurrently access the software.If you want additional concurrent users to work on the database at the same time you need to upgrade your licence to allow more concurrent users.
You can do this by logging into your customer area below and purchasing additional licences.
http://www.propertyportfoliosoftware.co.uk/index.php?cmd=login_user
Why am I getting a ‘Trial Expired’ message after I have been using the software?
Occasionally a registered installation of LPM can lose its licence information. Possible reasons for this are:- Wrong system time (often due to wrong time zone information in the Windows regional settings);
- Hardware update (a new hard drive, new motherboard, new video card, etc.) that invalidates the Client Unique Key (CUK);
- A malware infection like a trojan or a virus;
- Damage to the system registry or the isolated user storage.
Usually re-registering the software will resolve this problem. Even if you have a saved licence key file, it is recommended that you request a new licence key to make sure the most up-to-date system information is used for its generation.
How do I purchase additional concurrent user licences?
In order to purchase an additional user licence for your LPM software, please log into your customer area via the link below:http://www.propertyportfoliosoftware.co.uk/index.php?cmd=login_user
(If you cannot recall your password, please use the forgotten password link to have it resent immediately.)
Click on 'Add Users' and follow the on-screen order form. Once complete, your account will be updated immediately and additional users will be able to access the database simultaneously.
How do I back up my data?
Under the File menu you will find the Backup Database and Restore Database commands. The Backup Database command will create a backup of your current database and save it to the directory of your choice.The default file name will consist of the date and time of the backup. You can modify this file name or apply one of your own if you wish.
How do I find my back up files?
By default your backup files will be stored in your default backup directory. To see what this directory is, use the following menu path in the software:Preferences ==> Backup Settings
Here you will find a field called ‘Backup Path’.
Alternatively you can search for your backup files by doing a search of your computer or storage device for the following two file types:
*.mdb (if you are using a version that is lower than 7.65)
*.dbkp (if you are using a version that is greater than 7.65)
How do I send my database to you?
On the off chance that a problem cannot be resolved via email/phone, we will need a copy of your database.In such a case you will need to backup and send us your database.
To see how to backup your database go here.
Once backed up you need to send it to us. This can be done in one of two ways:
1. Email
If the backup database file is less than 10MB (click on file ==> properties to get the size of the file) simply respond to the support ticket and attach the database.
2. Transfer the file
If the database file size is larger than 10MB, then it is unlikely your email client will allow you to email it.
In such cases we usually recommend people to use http://sendspace.com. This service allows temporary secure storage for files up to 300 MB. Once you upload the file there, the site gives back a download link that the you can insert in the support ticket.
How do I migrate my data and gallery backup from Landlords Property Manager version 7.65 or a lower version?
You can import your database from the previous version of the software by following the steps below:1. Within the software choose the following menu path:
File ==> Import Data from Landlords Property Manager 7.6x
2. With the dialogue box that appears click 'Yes'
3. Navigate to where your previous version of the software is installed (e.g. the following was the default installation directory):
C:\Program Files\Landlords Property Manager Professional
or
C:\Program Files\Landlords Property Manager Regular
Here you will find a file called:
LPMPDB.DBP (For Landlords Property Manager - Professional users)
or
LPMRDB LPMPDB.DBP (For Landlords Property Manager - Regular users)
Highlight the file and click on OPEN and this will import the data for you.
4. You will then also be asked whether you want to import a Gallery backup
If you have been using the gallery function to store pictures of your properties etc then choose yes, otherwise choose no and your data will be successfully imported.
How do I restore a back up that I have made?
See the FAQ Answer to How do I back up my data? for guidance on creating a backup of your database.When you have saved a backup of your database and want to restore that information again, use the Restore function under the File menu to import the database.
Important: do not try to open the database by double-clicking on the database file directly, as you might open when opening a Word document, for example. To view the database, you must first import it into the property manager program using the Restore function described above.
Can I protect my data with a password?
You can add password protection to individual portfolios in your database.From within the portfolio in question, go to the Portfolio Management menu and select Edit Portfolio. Locate the password sub-section and enter a password in both boxes. Click on the Save button in the toolbar.
Each time you open that portfolio in future, you will be prompted to enter your password.
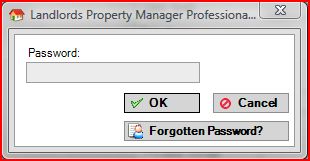
I'm being asked for a password when I start the software
This will be because you have put a password on your default database.This is controlled by going to the Portfolio Management menu, selecting Edit Portfolio and entering a password. If you have done this, each time you start the software you will be prompted for a password (see below):
How many portfolios can I create?
There is no limit to the number of portfolios you can create. This means that you can create as many different portfolios as you need, based on your own criteria.All the tax calculations and reports function within an individual portfolio only. They do not report across multiple portfolios, so it is possible to separate different parts of your business, or different businesses or ventures, by managing those properties and tenants from within different portfolios.
How do we move the software and database from one computer to another?
To move the software to a new computer follow the steps below:
Step 1
--------
First of all you need to backup your data, go here to see how to backup your data:
www.propertyportfoliosoftware.co.uk/lptmfaq.html#question40
Step 2
--------
Then you need to re-install the software on the new computer. If you don’t have a copy of the latest version you can download it by following the instructions here:
www.propertyportfoliosoftware.co.uk/lptmfaq.html#question76
Step 3
--------
Then refer to the following to restore the database:
Why am I being asked for a server IP when the software is started, even though I am on a local LPM server installation that was running fine until now?
If you have been successfully running LPM locally, and at some point you start to get a request to enter a Server IP and password at start up, this means that there may be a problem with the database server. On certain occasions system database files can get damaged and prevent the database server from starting properly.
If you have a recent database backup, then you can try to reinstall LPM in server mode again. This should reinstall the database engine components and replace any damaged system databases. After the reinstallation your LPM database will be reinitialised to a clean state so you should restore your most recent backup in order to restore your data.
On some systems however, problems may occur during the reinstallation of the database components, and the process may fail. In this case you should remove the database server instance manually from the Control Panel. In order to do so you should do the following:
1. Open Control Panel.
2. Go to "Programs and Features" or "Add or Remove Programs" (depending on your Windows version you will see one of these sub-sections).
3. Locate the entry "Microsoft SQL Server 2005", select it and click "Uninstall".
4. A dialog window will pop up prompring you to chose which components you want to uninstall. Make sure the check box "Remove SQL Server 2005 instance components" is ticked and from the list below select "PPSLPMSQLEXP: Database Engine" (this is the instance that LPM installs and uses).
5. When you click "Next" and then "Finish" on the next screen, the uninstall process should proceed automatically.
After the PPSLPMSQLEXP database engine instance has been uninstalled, you can try installing LPM in server mode again.
If you do NOT have a recent database backup then there is still a way to preserve your data. Before trying to reinstall LPM please navigate to the Microsoft SQL Server folder. By default it is located in:
C:\Program Files\Microsoft SQL Server
Under this folder you should see one or more folders named MSSQL.1, MSSQL.2, MSSQL.3, etc. Each holds the databases for the separate engine instances installed on your computer. Assuming that MSSQL.1 is the corresponding folder to the LPM engine intance, your actual data would be located in the following folder:
C:\Program Files\Microsoft SQL Server\MSSQL.1\MSSQL\Data
Where you should see the following 2 files (among others):
LPMData.mdf
LPMData_log.ldf
You should copy these 2 files to a safe location (i.e. your Desktop or Documents folder). Please make sure these files are not compressed. Windows has a compression system that is often used to preserve hard-drive space. The database server cannot access files compressed like this. Normally compressed files are displayed in blue in Windows Explorer windows so if these two files are blue, please select them, right click and chose Properties. From the dialog that appears select Advanced and you will see a checkbox that indicates whether the files are compressed or not. Uncheck it and apply the change.
You can then proceed with reinstalling LPM in server mode as outlined in the first part of this guide.
After LPM and the new database instance have been successfully isntalled, you should reattach the 2 database files you backed up earlier (LPMData.mdf and LPMData_log.ldf). In order to do so please follow the steps below:
1. Enter the Windows command prompt (Start -> Run -> enter "cmd" without the quotation marks and press the OK button).
2. Type in the following command line and press enter:
osql -S ./PPSLPMSQLEXP -U sa3. When prompted for password, please use the default password created when LPM installs the database instance:
sax12345x4. When you see the "1>" prompt execute the following commands:
sp_detach_db LPMData
goIf the execution is successful you should be simply returned to the standard "1>" prompt without any messages. Please do NOT close the command prompt yet.
You can now safely copy the two backup files (LPMData.mdf and LPMData_log.ldf) overwriting the new versions of these files in the "C:\Program Files\Microsoft SQL Server\MSSQL.1\MSSQL\Data" folder.
After this return to the console and execute the following commands:
EXEC sp_attach_db @dbname = N'LPMData',
@filename1 = N'C:\Program Files\Microsoft SQL Server\MSSQL.1\MSSQL\Data\LPMData.mdf',
@filename2 = N'C:\Program Files\Microsoft SQL Server\MSSQL.1\MSSQL\Data\LPMData_log.ldf';
go
Please make sure you use the actual instance subfolder in the paths if MSSQL.1 is not the one in your case.
Now you can quit the database management console by typing
quitYou can then close the entire console window. LPM should now have the latest copy of the data from before the damage.
How do I configure the early warning system to display at startup?
You can have the early warning system display when the software first starts by going to:Preferences ==> Early Warning Events
On this screen select the ‘Display Early Warning at Start-up’ flag.
This will then display all the alerts that fall within your selection criteria e.g. if you have specified 4 weeks notification for a safety certificate then it will show if the current date is within four weeks.
How Can I Extract Data from RLA' Property Manager?
You can export your properties and tenancies in CSV format from your RLA Property Manager.If you have not already done so, please upgrade your RLA Property Manager to the latest version v.3.42. The software should offer you this upgrade automatically but in case it does not you can for an update via its main menu using 'Help -> Auto Update'.
First open your RLA Property Manager programme and go to:
2. 'File -> Export Properties and Tenancies to Landlord Vision'.
3. You then have a choice to only transfer active tenancies or all of your tenancies regardless of status.
After the selection you will be prompted to choose a location to save the CSV file. Once saved, you will be able to navigate to the saved file to access the data.
Is the software compatible with a MAC OS?
Although our software is windows based, we have an increasing number of customers successfully running our solutions on Apple Mac systems. This is achieved by either using a Windows Emulator, which is a software application that enables the Windows operating system to run on a computer installed with a Mac OS, or by creating a partition on the hard drive and installing a Windows operating system on the other side of the partition. To use the software, you would boot the computer using the other partition.Further information on these solutions is widely available online.
Also, we have now launched our new cloud based landlord software solution called Landlord Vision, which works on any device connected to the internet. You can learn more about this increasingly popular solution here: www.landlordvision.co.uk.
What help and support do I get?
To learn more about the support you are entitled to please go to our Support CentreHow do I submit a support ticket?
You can submit a support ticket by using eitherof the two options below:
a) Support Manager
This is the preferred option.
Please open the software and click on the
‘Support Manager’ button that is displayed on
the right hand side of the software.
Please then click on ‘Submit a Support
Ticket’ to send the details of your problem.
b) Support email
If for some reason you are unable to open the
software then please send an email to
support@propertyportfoliosoftware.co.uk from the
email address that you used to purchase the
software.
I get an error message when I run the software or download updates
Users of the Vista Operating System may experience an error when they run the software for the first time. Follow the instructions below to activate a configuration tool which will adjust your system settings to correct the error:1. First make sure that the software is not running or attempting to run.
2. Navigate to C:Program Files/Landlords Property Manager and find the file called SetVistaPermissions.exe
3. Double-click on the file to activate the configuration tool.
4. Restart the software and check to see if the problem has been resolved.
What happens if my support contract is out of date?
If your 'priority' support contract has expired then you go onto our 'standard' sypport contract. However you can upgrade to our 'priority' support contract at anytime.You can find more information about the benefits of renewing your 'priority' support by going to our support page.
How do I check for new updates?
You can check to see if there are any updates available by going to Help menu» Auto Update » Check for Updates.I have been prompted for updates but can't download them
If, when you try to download updates, you receive the messageThe download process failed. Cannot establish a connection or cannot find the update package on the server.
Check that your internet connection is functioning correctly (check that your browser can access other websites and that the cables are properly plugged in). If the problem persists, temporarily disable any firewall software you may be using. If this works, you will need to reconfigure your firewall to permit the software to access the internet when upgrades are available.
How do I get updates?
Within the software we have an automatic update function which, if activated, will check to see if there are any updates available from the Property Tax Portal website each time the application is started (note: you must have a live internet connection when you start the application).Activate the automatic update function by going to the Help menu and selecting Auto Update. Place a tick in the box next to 'Auto check for updates at startup'.
If an update is found, you will be asked if you want to download it. Once downloaded, it will be installed automatically. This simple process ensures you are kept up-to-date with the latest release of the software at all times.
If the automatic update option is not activated then you can manually check for updates. To manually check for updates use the following path:
Help menu» Auto Update » Check for Updates
I have an old version, but when I check for updates it says none are found.
The most likely reason for this is because you have a firewall activated on your computer and it is preventing the software from accessing our website to check for the updates.Please change your firewall settings so that it allows the software to access the internet.
My software won't start after an update, what can I do?
If this happens then you can manually roll-back to the previous version.Reverting (rolling) back to the previous version manually is easy.
Go to the installation folder and enter the subfolder "lptm_v_backups".
Then simply copy all the files in there, and overwrite the files in the main installation folder with these.
Example
LPM - Professional is installed in the following folder:
C:\Program Files\Landlords Property Manager NT Professional
You go to the following subfolder in this directory: lptm_v_backups
Select all the files in this subfolder and copy them back into the folder:
C:\Program Files\Landlords Property Manager NT Professional
I have version 7.6x but can't update to version 7.7x through automatic updates
Yes, it is not possible to use the automatic updates to upgrade to this new version of the software.It requires a brand new installation as the underlying technology has changes to support multiple users. As an existing version 7 customer you are entitled to a free upgrade to this newer version.
Please use the link below to get your upgrade:
>> www.propertyportfoliosoftware.co.uk/lpm_pro_net.html
We are constantly adding new functionality to the software, and you can see what is new by going here:
>> http://www.propertyportfoliosoftware.co.uk/release_notes.html
What's a screenshot?
A screenshot is a digital image of the visible items on your computer screen.In other words, it's a way of taking a picture of whatever is on your screen at that moment, as though you were using a camera.
Following the camera analogy, you would 'take' a screenshot in the same way that you 'take' a picture with a camera.
Why would I take a screenshot?
If a picture is worth a thousand words, a screenshot is worth at least ten emails!If you experience an error and receive an error message that you can't interpret, you can take a screenshot of the error message and send it to Support as an attachment along with a description of the problem in the body of the email. This avoids you having to type out the error message or trying to read it out over the phone.
You could also send us a screenshot if you're having trouble learning to use the software, or figuring out how best to input your data. Send us a picture of the data and a description of what you're trying to do and our Experts can advise you.
How do I take a screenshot?
You take the picture by pressing the Print Screen key. The Print Screen key is often abbreviated to Prnt Scrn or Prt Sc and is usually found on the right-hand side of a standard British English keyboard.The Print Screen key is like the shutter button on your camera.
Users of Windows Vista can also use the Snipping Tool located under Accessories in the Start Menu.
When you press the Print Screen, nothing will appear to happen, because the image will have been saved to your computers clipboard. The clipboard is where things go when you 'copy' them by using the Copy command under the Edit menu of your word processor or email program.
To 'paste' the screenshot out of the clipboard, go to the Start Menu, select Programs, go to the Accessories folder and open the Paint program. Within Paint, go to the Edit menu and select Paste.
Voila!
Now go to the File menu in Paint and select Save As. Give your screenshot an appropriate name and check that the file type is JPEG. This is important because otherwise the file will be too big to send to us. If you want, you add text to the screenshot as well. While the screenshot is open in Paint, you can use the text tool from the Pain toolbar to add a box of text to the image.
Save the file and attach it to an email to Support along with a description of why you're sending it!
How do I enter a new tenant?
To enter a new tenant, go to the Tenant Manager > Tenant Details tab and click on the green Add button in the toolbar at the top of the screen. Fill in the tenant's information in the blank form below.Note: only 3 pieces of information are required to create a record. These fields are coloured orange on the form. All other fields are optional and may be used at your discretion.
When you have filled in the information, click on the blue Save button in the toolbar. The tenant you have just added will appear in the list of tenants at the bottom of the screen.
How do I amend the details of an existing tenant?
To make changes to the personal details of an existing tenant in the database, go to the Tenant Manager > Tenant Details tab and select the tenant in question from the list at the bottom of the screen. Select the tenant by clicking on the entry once.Note: if the tenant does not appear in this list, you have not yet added them to the database.
When you select a tenant from the list, their details are displayed in the form above. You can now make any necessary changes to the record. When you have made the changes, be sure to click on the blue Save button in the toolbar to save the changes you have made.
Houses in Multiple Occupation (HMOs)
How do I set up a property as an HMO?In the Property Manager, locate the Rooms sub-section of the Main Information tab. Click on the Add button in this sub-section. This will open a dialogue box in which you can define various attributes of the room. To identify that room as an HMO, tick on the 'Is room habitable?' tick box.
Once a room has been classed as a habitable room you are then able to assign tenants to individual rooms within a property when you create the tenancy agreements.
You can now track the income for the room separately as the software treats this room as an individual Let for reporting purposes.
The Tenancy Agreement
How up-to-date is the tenancy agreement that is provided in the software?The tenancy agreement is provided by Tessa Shepperson from www.landlordlaw.co.uk and it is regularly reviewed and updated by her.
How do I handle DSS payments?
You can download a tutorial that demonstrates how to handle DSS payments hereCan I print off the amount of rent that has been paid by a tenant and send the report to him?
Yes – the Tenant Payment History report can be generated and sent on to the tenant. Also, all the reports that are generated from within the software can be downloaded into Microsoft Word or Excel so you can edit them as you require.No matter when a tenant moves in we like to get them to pay rent by the end of the month and thereafter they pay monthly. How do we handle this?
This requirement is catered for within the software and is a standard solution.You need to create two tenancies, one for the first payment to the end of the month (irregular) payment and one for the regular (monthly) payment thereafter.
Here is what you need to do:
Create Irregular Payment
When you are creating the rental payment from the start date to the end of the month (i.e. for the first period) you click on the 'Create New Tenancy' button in the 'Tenancy Details' tab and choose the 'Payment Term' of 'Irregular Payment'. This will then create you the entry in the rent schedule for the irregular period that you require (i.e. to the end of the month).
Create Regular (monthly) Payment
Then when you want to create the next rental payment to start from the first day of the month to the end of the month (i.e. on an ongoing basis), you do the same as before but this time just choose 'Monthly Payment' for the 'Payment Term'. This will then create you the monthly entries in the rent schedule for the period that you require.
How can I delete all the entries in the rent schedule?
In order to delete the rent schedule you must delete the tenancy. This will then delete all the associated rents that have been created in the rent schedule.To do this go to:
Tenant Manager ==> Tenancy Details ==> highlight the tenancy and click the 'Delete Tenancy' button
This will delete the entire rent schedule for this tenancy and you can then create the tenancy again and create a new rent schedule.
Is it possible to only display 'Active' tenants and hide those tenants who have left the property?
Yes it is possible to filter the list of tenants that are displayed.In 'Tenant Manager' in the list at the bottom of the screen, you have the column heading 'Tenancy Status'.
Click on the down arrow (in the column heading) and this will allow you to filter on what you want to display e.g. Active, Expired tenants etc.
Once you have selected a criteria, it will filter the list and show your selection criteria at the bottom of the screen .
You can then edit this criteria further by clicking on the Edit Filter' button which appears in the bottom right hand corner of the screen.
You can delete the filter at anytime to display the entire list of tenants.
I have a tenant who is in arrears and is now making overpayments to catch up. What is the best way to enter these in the software?
When a tenant has fallen into arrears they will start paying off the arrears slowly or will make overpayments in subsequent months.When entering such rents into the rent schedule, they should be tied back to the date when they were due.
For example you have the following:
Date Owed | Amount Owed
14/05/2009 | £500
14/06/2009 | £500
Let's look at two scenarios of how the payments could be made (if they aren't made on time):
SCENARIO A - Payments all made as part payments
--------------------------------------------------------------
You receive three payments for the £500 owed on 14/05/2009
Date Paid Amount Paid
14/05/2009 £100
20/05/2009 £300
25/05/2009 £100
Each of the payments would be assigned to the date when it was owed i.e. 14/05/2009. One would be posted against the actual rent entry and the other two as ad hoc payments.
SCENARIO B - Tenant overpays in one month
--------------------------------------------------------------
You receive two payments for the £500 owed on 14/05/2009
Date Paid Amount Paid
14/05/2009 £100
20/05/2009 £300
You then receive £600 on 14/06/2009. Now the rent that is due on this date is only £500, so the tenant is paying of the final £100 arrears of the previous month. So the £600 received would be entered as follows:
Date Paid Amount Paid
14/06/2009 £100 and this will be assigned to the due date of 14/05/2009
14/06/2009 £500 and this will be assigned to the due date of 14/06/2009
This will help make sure that the payments all tie back to when they were due and you get to see a full picture of what is outstanding.
I have a house I let to multiple tenenta. I want to track rent on a per tenant basis. However I also want them on the same (i.e. one) tenancy agreement.
There are two ways to do this:Assign Tenants as Secondary Tenants
-----------------------------------
Once you have created the tenants and the rent schedules for each tenants, you can edit the tenancy for one of the tenants and assign the other tenants to the tenancy agreement.
To do this, goto:
"Tenant Manager" ==> "Tenancy Details" ==> "Edit Tenancy" (Button)
Choose the "Other Tenants" tab and the press the 'Add Tenants" button. For the purpose of creating the tenancy agreement you will be able to add the other tenants to the AST.
When you create the tenancy all the tenants names will print on it.
Create AST Manually
--------------------
1. Create the tenancy agreement and export it to MS Word and edit to add the additional tenant names. Once signed by all tenants you can scan it in and store it against one or each tenants.
2. Create the 'tenancies' in the software for the individual tenants so that you can track the rental income per student basis (as per your requirement)
3. You will also be able to run the report in:
'Report Manager' ==> "Rental Income Report"
to see the income from all students for the whole property.
Can the software manage both private/residential and commercial property?
Yes, the software can be used to manage commercial property (i.e. shops and other commercial premises) and properties held within a company as well as personally owned residential property.To manage a commercial property, set-up the property in the database and record all the income and expenses as you would for a residential property. The easiest way to do this is to create a new portfolio under your company name and maintain your company owned properties within this separate portfolio.
See also the FAQ answer on running multiple portfolios.
Can I manage short term and/or long term holiday lets?
Yes – there is no distinction between short-term lets and long-term lets as you are still capturing all your income and expenditures against the properties. The only difference between managing residential or commercial property and holiday lets is the shorter time frame, which will result in more tenancy agreements and rent schedules over the course of a year.Can I manage my overseas properties?
Yes, you can create a separate portfolio for each country where you own property and select the appropriate currency for each portfolio. This ensures that all the reporting values for the property will be displayed in the correct currency.The software can cater for over 100 currencies.
Can the software calculate in multiple currencies?
Yes – when you create a portfolio you can choose the currency that you want all the figures to be displayed in.For example, if you hold property in the USA, you can choose the $ currency and all numerical values and reports will be displayed in this currency.
If you wish to change this later, you can do so from the Edit Portfolio screen under the Portfolio Management menu.
Inputting Insurance Data
What is the difference between the insurance in Rents, Rates & Insurance and the one in Utility & Insurance?Information recorded under Property Details > Utilities & Insurance is included in documents such as the Tenant Welcome Pack. It is used for reference purposes and therefore, it is not mandatory information that you must enter. It's for your own convenience and that of your tenants.
Rents, Rates & Insurances is used to record those types of costs as they occur, in the same way that you might enter legal expenditures under the Other Costs tab.
How do I handle my letting agents fees?
You can enter letting agent fees using either one of the following two ways:a) If you prefer to manually enter the letting agent's fees each month you can use the Property Manager -> Other Costs -> Professional & Legal section. This will involve you manually adding the letting agent's fees each month.
b) Alternatively, you can use the Property Manager -> Other Costs -> Other Costs section to specify the monthly letting agent's fees. On the Add Other Cost form you can use the three dots ("...") button to add a new cost description. Enter the cost amount, select start and end date and tick the 'Monthly Cost' check box. This will cause the same letting agent's fee to appear on the reports every month on the day of the start date.
Why Has My List of Properties Disappeared from the Bottom of the Screen?
When any of the column headings are ticked either intentionally or accidentally, a filter will be applied to sort your data as per the column heading. Sometimes a filter is applied so that all data is hidden at the same time.To check that a filter has been applied, look for 'Edit Filter' in the bottom right hand corner of your screen.
To remove the filter, go to opposite left hand corner and click on the X. All of the list will then appear.
Recording an advance on an existing mortgage
When obtaining a further advance from a mortgage lender on a mortgage that already exists, where do I enter this further advance in the software?You would assign a second loan or mortgage to the property.
Administration fees for a further advance
There is often an administration fee charged by the lender for a further advance. Where do I record this in the software?The recommended practice is to record this in the Professional & Legal section of the Other Costs tab under the Property Manager. You can find this under the following path:
Property Manager >> Other Costs >> Professional & Legal
Information entered in this section is accounted for in the reports.
Mortgage arrangement fees
A mortgage arrangement fee is usually just added to the mortgage. How do I show this in the software?If it is the first mortgage used to finance the purchase, record this fee in the Purchase Details section which can be found under the Property Manager at the following location:
Property Manager >> Purchase & Selling Details >> Purchase Details
For all future mortgages and/or advances on existing mortgages, record the fees in the Other Costs section, as described in the answer to Administration fees for a further advance
How do I enter generic costs that can not be assigned to a single property
You may have a cost that cannot be attributed to a single property but which applies to numerous properties within a portfolio.In such cases, you have three options:
1. Create a dummy property
2. Split the cost across the entire portfolio
3. Assign the cost to a property that has the largest share of that cost
Use the dummy portfolio to record all of your portfolio-wide costs. Costs that only apply to individual properties should still be recorded under that property.
Splitting the cost across the entire portfolio "evens out" the cost for reporting purposes so that when running a report on any individual properties, it does not bias the result.
Using any of these methods will preserve your ability to run accurate reports on your portfolio.
How do I record travelling costs
Costa that are incurred when travelling to and from a property can be entered in the software in the following area:Property manager ==> Services, Wages and Travel ==> Travel
Here you can enter the cost of the petrol used and in the 'Notes' field you can record the number of miles done.
REMEMBER
You can claim for the cost of travel to and from the property, provided the trip was wholly for a business purpose.
This is normally done using the ‘apportionment’ method. The apportionment method involves keeping a log of the annual car mileage and all the expenditures that have been incurred on the car (including petrol receipts).
You determine how many miles were for the purpose of your property business and then apportion the expenditure accordingly.
You must be able to prove the trip was purely for a business purpose, though!
Therefore it important that you keep a log of the mileage that you have done for the purpose of your property. For each trip, make sure you keep a log of the following:
- the date the trip was made;
- the purpose of the trip (e.g., visit tenant, carry out maintenance repairs, etc.);
- the miles that were travelled.
Please note
You are not only restricted to claiming for usage of petrol. You are also able to claim the business (property usage) proportion of insurance, repairs, servicing, MOT, AA membership etc
What do I do if I'm receiving a 'Margin's too Wide' error message when trying to print reports and/or documents from the software?
This problem is most often related to problems with the set-up of the installed printer.A re-installation of the printer drivers should solve the problem. The most straightforward method to do so is to remove the printer reference from the "Devices and Printers" wizard (found in the Windows start menu, or from within the Control Panel), and then relocate and attach the printer again.
If the problem persists, or the printer is otherwise unresponsive, please consult this Microsoft article:
http://windows.microsoft.com/en-US/windows-vista/Find-and-install-printer-drivers
Why am I receiving a message saying "Property Tax Manager has stopped working. Windows is checking for solution to the problem..."?
Various reasons could lead to this. Most common ones are missing system files from the Landlords Property Manager installation, or damaged .NET Framework libraries.You can try the following things to resolve the problem:
- Reinstall Landlords Property Manager in CLIENT mode. This will replace any damaged files and add any missing files to your LPM installation, but keeping your database untouched in the process.
- If LPM still comes down with the same problem after this, then you can do a .NET Framework repair. Go to "Control Panel -> Programs and Features" and locate the entry "Microsoft .NET Framework". There may be several entries with this name. Look for the one with the highest version number. Double-click on it, and you will be presented with a dialog box asking to chose "Uninstall" or "Repair". Select "Repair" and click the "Next" button. The process should be automatic afterwards. If any input is required just pick the default values.
How do I Rollback to the previous version of software?
If you ever need to rollback to the previous minor version of the software this can be done automatically or manually.Automatically
From the Help menu, choose the option to Rollback to previous version.
Manually
Reverting to the old version manually is actually easy to do manually.
What you have to do is go to the LPM folder, enter the subfolder "lptm_v_backups", copy all the files in there, and overwrite the files in the main folder with these.
How do I Apply Filters?
The purpose of the 'Filter' functionality is to allow you to control what information appears in any list that you create. That could be the list of properties in the bottom half of Property Manager, the list of tenants in the bottom half of Tenant Manager, the rent schedule and any expenses entered into the various tabs in the Property Manager.To apply a filter, I first select the column that I want to work from and then edit the filter with further criteria. For example:
We have a list of tenants in the Tenant Manager but only want to view the active tenants that have moved in during 2011. To set this up:
- Click on the drop down arrow at the top of the 'Tenancy Status' column
- Select 'Active'
This has now sorted the list, hiding tenants whose tenancies have expired and displaying the active ones only. 'Edit Filter' now appears in the bottom right hand corner of the screen.
To now set up the second level of our filter to enable us to see which of these tenancies began in 2011:
- Click on 'Edit Filter'
- Click on the white plus + symbol that appears to the right of the 'And' text
- Click on 'End Date' and choose 'Start Date' from the list
- Click on 'Equals' and change to 'Is between'
- Enter the start date of the period that I intend to look at. In this case 01/01/2011
- Enter the end date of the period that I intend to look at. In this case 31/12/2011
- Click on 'Ok'
The list now only reveals the active tenancies that began in 2011.
- Home
- About Us
- Why Landlord Software
- Success Stories
- Contact Us
- Audio and Video Demonstrations
- FAQ
- Support Services
- Upgrades
- Contact Support
- Articles
- FAQ
- Press
- Privacy Policy
- Sitemap
- Terms and Conditons
- XML Sitemap
- RSS Feed
Copyright © Property Portfolio Software 2007 - 2014, All Rights Reserved
